博文

目前显示的是标签为“STM32F103C8T6”的博文

STM32 pins VCC, VDD, VEE, VSS, VBAT

图片
  This is a fundamental and important concept when starting with STM32 (or any microcontroller ). Here’s a clear breakdown of what these pins mean and how to handle them on an STM32. The Quick Answer (TL;DR) VDD:   Positive supply voltage  for the  digital  internal logic. (e.g., 3.3V) VCC:   Positive supply voltage  for the  analog  peripherals (ADCs, DACs, etc.) and I/O pins. Often connected to the same 3.3V rail as VDD. VSS:   Ground reference  for the digital circuitry (0V). VSSA:   Ground reference  for the analog circuitry. (Must be connected to VSS but with a careful layout). VREF+ / VREF-:   Reference voltage  for the Analog-to-Digital Converter (ADC). Provides a cleaner reference than VCC/VSSA for accurate measurements. VBAT:  Backup power input for the Real-Time Clock (RTC), backup registers, and sometimes the low-power oscillator when main power is off. VEE:   Negative supply voltage . Rar...

How to create a Ready-to-use STM32CubeIDE project for DS18B20?

图片
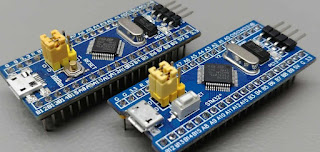
 Here's a step-by-step guide to create a ready-to-use STM32CubeIDE project for reading temperature from the DS18B20 sensor using STM32 HAL . The example assumes you're using STM32F103C8T6 ("Blue Pill") but can be adapted to other STM32 chips. Project Overview Microcontroller : STM32F103C8T6 Sensor : DS18B20 Interface : 1-Wire protocol (bit-banged using GPIO) Development Tool : STM32CubeIDE Library : MaJerle's OneWire and DS18B20 drivers (HAL-compatible) Wiring Recap DS18B20 Pin Connect To STM32 GND GND VDD 3.3V DQ PA1 (or your chosen GPIO) 4.7 kΩ Between DQ and VDD Project Setup Steps  1. Create a New Project Open STM32CubeIDE File → New → STM32 Project Select STM32F103C8T6 (or your MCU) Name your project: DS18B20_Project  2. Configure GPIO Open .ioc file Set PA1 as GPIO_Output Enable USART1 (optional, for serial print/debug) Enable SYS → Debug: Serial Wire (for SWD debugging)  3. Add DS18B20 + On...

STM32 Microcontroller Tutorial: From Beginner to Advanced

图片
  This comprehensive STM32 tutorial covers everything from setting up your development environment to programming peripherals and using RTOS. STM32 (based on ARM Cortex-M) is one of the most popular 32-bit MCU families for embedded systems. 1. Getting Started with STM32 Hardware You'll Need STM32 development board (common options): Beginner : STM32F103C8T6 (Blue Pill, $5) Wireless : STM32WB55 (Bluetooth 5.0) High-performance : STM32H743 (Cortex-M7, 480 MHz) ST-Link programmer/debugger (or onboard debugger like STM32 Nucleo) USB cable, breadboard, LEDs, resistors Software Setup Install STM32CubeIDE  (Free official IDE from ST) Includes compiler, debugger, and STM32CubeMX (visual configurator) Download:  www.st.com/stm32cubeide Alternative Toolchains PlatformIO (VS Code extension) Keil MDK (Commercial) ARM GCC + Makefile (Advanced users) 2. Your First STM32 Program (Blinky LED) Using STM32CubeIDE Create New Project Select your MCU model (e.g., STM32F103C8 ) Configure clo...