STM32 Microcontroller Tutorial: From Beginner to Advanced
This comprehensive STM32 tutorial covers everything from setting up your development environment to programming peripherals and using RTOS. STM32 (based on ARM Cortex-M) is one of the most popular 32-bit MCU families for embedded systems.
1. Getting Started with STM32
Hardware You'll Need
STM32 development board (common options):
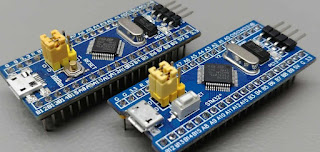
Beginner: STM32F103C8T6 (Blue Pill, $5)
Wireless: STM32WB55 (Bluetooth 5.0)
High-performance: STM32H743 (Cortex-M7, 480 MHz)
ST-Link programmer/debugger (or onboard debugger like STM32 Nucleo)
USB cable, breadboard, LEDs, resistors
Software Setup
Install STM32CubeIDE (Free official IDE from ST)
Includes compiler, debugger, and STM32CubeMX (visual configurator)
Download: www.st.com/stm32cubeide
Alternative Toolchains
PlatformIO (VS Code extension)
Keil MDK (Commercial)
ARM GCC + Makefile (Advanced users)
2. Your First STM32 Program (Blinky LED)
Using STM32CubeIDE
Create New Project
Select your MCU model (e.g., STM32F103C8)
Configure clock (e.g., 72 MHz for F103)
Configure GPIO Pin
Open STM32CubeMX view
Select a pin (e.g., PC13 on Blue Pill) → Set as GPIO_Output
Generate Code
Click "Generate Code" → Initialize peripherals
Write Main Loop
while (1) {
  HAL_GPIO_TogglePin(GPIOC, GPIO_PIN_13);
  HAL_Delay(500); // 500ms delay
}
Build & Flash
Connect ST-Link → Click "Debug"
3. Key STM32 Peripherals Tutorial
A. GPIO (Digital Input/Output)
// Read button on PB0
if(HAL_GPIO_ReadPin(GPIOB, GPIO_PIN_0) == GPIO_PIN_SET) {
  HAL_GPIO_WritePin(GPIOC, GPIO_PIN_13, GPIO_PIN_SET); // LED on
}
B. UART (Serial Communication)
// Send "Hello" over UART1 (PA9-TX, PA10-RX)
HAL_UART_Transmit(&huart1, "Hello\r\n", 7, HAL_MAX_DELAY);

// Receive data
uint8_t rx_data;
HAL_UART_Receive(&huart1, &rx_data, 1, HAL_MAX_DELAY);
C. ADC (Analog Read)
// Read potentiometer on PA0
uint32_t adc_value;
HAL_ADC_Start(&hadc1);
adc_value = HAL_ADC_GetValue(&hadc1);
D. PWM (Motor Control, LED Dimming)
// Set PWM duty cycle (50%) on TIM2_CH1 (PA0)
HAL_TIM_PWM_Start(&htim2, TIM_CHANNEL_1);
__HAL_TIM_SET_COMPARE(&htim2, TIM_CHANNEL_1, 500); // 50% of 1000
E. I2C (Sensor Communication)
// Read from BMP280 (I2C address 0x76)
uint8_t reg = 0xD0; // Chip ID register
uint8_t data;
HAL_I2C_Mem_Read(&hi2c1, 0x76<<1, reg, 1, &data, 1, 100);
4. Intermediate: Using FreeRTOS on STM32
Enable FreeRTOS in STM32CubeMX
Middleware → FreeRTOS → CMSIS_V2
Create Two Tasks
void Task1(void *pvParameters) {
  while(1) {
    HAL_GPIO_TogglePin(GPIOC, GPIO_PIN_13);
    osDelay(200); // FreeRTOS delay
  }
}

void Task2(void *pvParameters) {
  while(1) {
    HAL_UART_Transmit(&huart1, "Task2\r\n", 7, 100);
    osDelay(1000);
  }
}
Start Scheduler in main()
osKernelInitialize();
osThreadNew(Task1, NULL, NULL);
osThreadNew(Task2, NULL, NULL);
osKernelStart();
5. Advanced Topics
A. Low-Power Modes
// Enter STOP mode (wake on EXTI)
HAL_PWR_EnterSTOPMode(PWR_LOWPOWERREGULATOR_ON, PWR_STOPENTRY_WFI);
B. DMA (Direct Memory Access)
Use for high-speed ADC/UART transfers without CPU
C. STM32 Hardware Security
Read Protection (RDP)
Secure Boot & Flash Encryption
6. Debugging Tips
Use STM32CubeMonitor for real-time variable tracking
SWV ITM Trace (printf debugging via SWD)
Logic Analyzer for timing-critical signals
7. Project Ideas
| Level | Project | Peripherals Used |
|---|---|---|
| Beginner | LED Blinky | GPIO |
| Intermediate | Temperature Logger | UART, I2C, ADC |
| Advanced | Motor PID Controller | PWM, TIM, Encoder |
| Expert | RTOS-Based Smart Sensor | FreeRTOS, BLE, DMA |
Where to Go Next?
Official STM32 Documentation: ST Microelectronics
STM32 Communities: STM32duino Forum, EEVBlog
Books: "Mastering STM32" by Carmine Noviello


评论
发表评论